Why Dwarf Hairgrass Melts After Planting — Even When You’re Doing Everything Right
Dwarf hairgrass (Eleocharis parvula or E. acicularis) melts after planting for one primary reason: the blades you planted were grown emersed (above water), and submerged conditions force the plant to replace every single blade from scratch. This is not a deficiency, a disease, or a sign that something is wrong with your tank. It is a predictable, near-universal transition that takes two to six weeks regardless of whether you’re running pressurised CO2, EI dosing, and a quality substrate. The blades that melt are physically incapable of surviving submerged — their stomata, cuticle thickness, and internal gas-exchange architecture are all calibrated for air. The plant isn’t dying; it is shedding obsolete tissue while simultaneously growing submersed-adapted replacements from the roots. Understanding this transition is what separates hobbyists who panic and tear everything out from those who end up with a carpet.
Tropica 1-2-Grow! Eleocharis parvula (Tissue Culture Cup)
Sterile, gel-grown dwarf hairgrass in a sealed cup — shorter melt period than emersed pot stock and no snails or algae introduced at planting.
Emersed vs. Submersed Growth — The Real Cause of Post-Planting Melt
Almost all commercially sold dwarf hairgrass is farmed emersed, either in shallow trays or tissue culture. Emersed blades are typically thicker, stiffer, lighter green, and have a slightly waxy surface. When you push those blades into a substrate and flood them, the plant immediately begins metabolising them back because they represent a maintenance cost with no photosynthetic return underwater. The chloroplasts in emersed tissue are positioned and structured for harvesting direct sunlight from above; submerged, the light spectrum, intensity, and diffusion are different enough that the plant can’t reconfigure the existing cells — it just builds new ones.
This is why CO2 and fertiliser don’t prevent the melt. They actually accelerate it, because a healthier plant transitions faster. I’ve had hairgrass in a well-set-up 30L with 30 ppm CO2, ADA Amazonia substrate, and daily microdosing of TNC Complete strip to a near-bald substrate within eight days — then come back thick and submersed-grown by day 28. In an under-lit, no-CO2 tank the same melt plays out over four to eight weeks instead.
How to Tell the Difference Between Normal Melt and an Actual Problem
Not every melt is normal transition. There are two failure modes that look similar but need different responses.
Normal Transition Melt
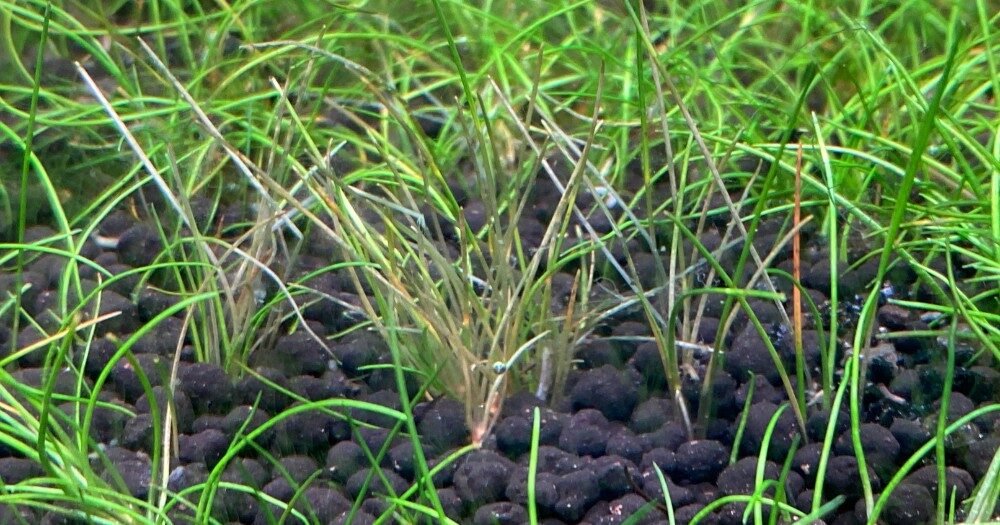
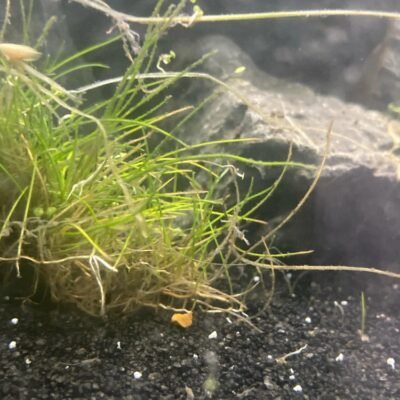
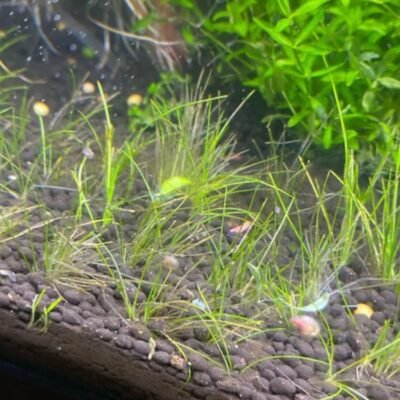
The blades yellow from the tip downward, turn translucent brown, and collapse over one to three weeks. Meanwhile — and this is the diagnostic — new bright-green, thin, upright blades appear from the same nodes or from runners close to the original planting points. If you see new growth, you are fine. Do not remove the plant. Do not change your parameters. Trim off the dead material with scissors at substrate level to prevent it from fouling the water column and leave the new growth alone.
Melt That Won’t Stop
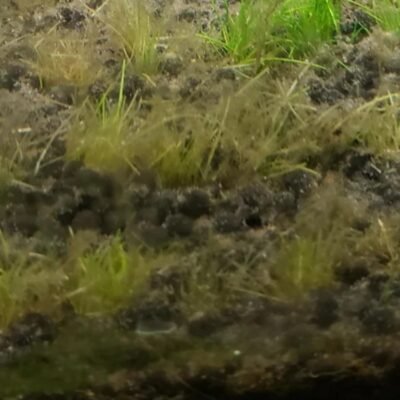
If by week four you have zero new growth — just bare substrate — then something else is going on. The most common culprits in order of frequency:
- Substrate too compact or wrong grain sizeE. parvula roots need to penetrate easily
- Planted too deep — blades buried below the crowncrown should sit exactly at substrate surface
- Ammonia spike from new substrate killing roots before runners formcommon with ADA Amazonia in first 2–3 weeks
- Light below 50 PAR at substrate levelhairgrass carpets need more light than most people run
- Allelopathy or bacterial infection from decaying organic matter in substratecommon if soil substrate wasn’t rinsed
Planting Technique That Reduces Dwarf Hairgrass Melt Severity
You can’t eliminate the emersed-to-submersed transition, but sloppy technique makes it significantly worse by damaging the roots that are supposed to be pushing out new runners during the transition period.
Splitting and Spacing
Most pots of E. parvula come as a dense plug. Split it into individual blades or clusters of two to four blades maximum. Plant each cluster 1–1.5 cm apart. Dense planting looks fuller on day one but the interior clusters suffocate during melt and never recover, giving you a patchy carpet six weeks in. Sparse, even spacing produces a more uniform carpet by week eight.
Planting Depth and Crown Position
Insert each cluster just deep enough that the roots grip — roughly 5–8 mm into the substrate. The crown (where blade meets root) must sit at or just above the substrate surface. Buried crowns rot. Use a fine-tipped plant tweezers (Aquascape Tools 20cm stainless tweezers work well) rather than your fingers — fingers disturb too much substrate and you end up replanting the same cluster three times.
Tissue Culture vs. Pot-Grown
Tissue culture hairgrass (sold in lidded plastic cups, brands like Tropica 1-2-Grow! or Dennerle InVitro) is grown in gel, not emersed, but it still melts post-planting because the gel culture environment is sterile and controlled in ways your tank isn’t. TC plants also need to be washed thoroughly — residual gel left on the roots introduces bacteria into the substrate. The melt from TC plants is typically shorter (one to two weeks) and less complete because the plants are younger and more metabolically flexible.
Substrate, CO2, and Light — What Actually Matters During the Transition
Your setup doesn’t prevent the melt, but it does determine whether the plant comes back or doesn’t.
Substrate
Dwarf hairgrass spreads by stolons that need to push through substrate laterally. Coarse gravel above 2–3 mm grain size creates air pockets and gaps that runners struggle to navigate. Fine sand (0.5–1 mm) is actually better for spreading than most aquasoils, but lacks nutrients. The best combination is a nutrient-rich base layer (ADA Amazonia, Fluval Stratum, or similar) capped with 1–2 mm natural sand at 1 cm depth. The roots access nutrients from below; the sand makes lateral runner spread easy.
If you’re using Amazonia specifically: the ammonia leach it produces in weeks one through three is genuinely high enough to burn hairgrass roots. Running the tank fishless for three weeks before planting, or doing heavy daily water changes, matters more for hairgrass survival than any other single factor with that substrate.
CO2
Hairgrass is a mid-to-high CO2 demand plant once established. During the transition, CO2 doesn’t prevent melt but it dramatically accelerates new submersed growth. The difference between 15 ppm and 30 ppm CO2 in a hairgrass carpet is roughly two weeks of establishment time. Run your drop checker green (not yellow — that’s too high and stresses fish) and inject from lights-on to lights-off with a one-hour ramp up and down via solenoid. The AquaRio Neo CO2 diffuser with a ceramic membrane produces fine enough bubbles for efficient dissolution in tanks under 60L.
Light
This is where most hairgrass carpets fail silently. You need meaningful PAR at substrate level — not just at the surface. A light that reads 150 PAR at 10 cm depth may only deliver 40–50 PAR at 20 cm depth in a planted tank with any tannin staining or scattering from fine substrate particles. Hairgrass needs at least 50–70 PAR at substrate level to produce new runners aggressively. Measure with a PAR meter if you have one; otherwise, running a high-output light like the Chihiros WRGB II or Twinstar series at full power over a shallow tank (under 25 cm depth) is generally sufficient. Photoperiod during establishment: 8 hours is enough — longer photoperiods in a new tank just fuel algae.
Chihiros WRGB II 30 (30 cm variant)
Delivers high enough PAR at substrate level in tanks under 30 cm depth to drive submersed hairgrass regrowth without extended photoperiods that fuel algae.
Algae During the Melt Phase — Managing the Most Common Side Effect
Melting blades release phosphorus and organic compounds into the water. Combined with the high light and CO2 you’re running to push new growth, this creates ideal conditions for hair algae and cyanobacteria on the bare substrate patches. The practical response:
- Trim and siphon dead material immediatelydon’t let it sit and decay
- Reduce photoperiod to 6–7 hours during peak meltweeks 1–3
- Introduce a small cleanup crew earlyAmano shrimp handle hair algae on hairgrass better than anything
- Spot-dose Excel (glutaraldehyde) directly onto algae patches with a syringe if they establish0.5 mL per application, targeted
Resist the urge to blast nutrients at the melt — this is the single most common over-reaction. The plant isn’t melting because it’s hungry; it’s melting because it’s rebuilding. Extra fertiliser during active melt feeds algae more than it feeds hairgrass.
Realistic Timeline: What to Expect Week by Week
| Week 1 | Emersed blades begin yellowing at tips; tank looks unchanged except for slight discolouration |
| Week 2 | Active melt — substrate may look nearly bare in patches; first thin submersed blades visible at base |
| Week 3 | New submersed blades growing visibly; old blades mostly gone or fully brown |
| Week 4 | Runners beginning to spread laterally; sparse but clearly establishing carpet |
| Week 6–8 | Full carpet coverage if planted at correct spacing with adequate light and CO2 |
Any timeline longer than this, assuming good light and CO2, usually points back to one of the substrate or planting depth issues listed earlier. Go back and check crown position first — it’s the single most common fixable mistake.
When to Give Up and Replant vs. Wait It Out
Give the plant six weeks from the day of planting before concluding it has failed. If at week six you have zero new growth and nothing but bare substrate, pull a section and examine the roots under a magnifying glass. Black, mushy roots indicate rot — likely from crown burial, poor substrate, or an ammonia spike. White or cream-coloured roots that are firm indicate the plant is alive but stalled, usually from insufficient light. A completely dead plant will have no live root tissue at all and will pull out of the substrate with zero resistance.
If you replant, fix the actual cause before you put new plants in. Replanting into the same conditions that killed the first batch produces the same result. The most reliable reset is to empty the tank, address the substrate issue (cap with fine sand if it’s too coarse, reduce depth if crowns were burying), and replant with tissue culture stock, which is cleaner and more uniform than pot-grown material for a second attempt.
Aquascape Tools Stainless Straight Tweezers 20cm
Fine enough tips to plant individual hairgrass clusters at precise depth and spacing without disturbing surrounding substrate — the single tool that makes correct crown placement actually achievable.

Aquascaping and nano fish notes from tanks run in Negombo, Sri Lanka.